Learning What is 404 Error Message?
What is 404 Error Page ?
404 Error Message is a HTTP Response Code It Indicates that The Client was able to connect to the sites Server But The Server Does not find What Client Requested. As We All Know Our Blogger Sites are hosted by Blogger itself. So Blogger Generates Default 404 Error Message to the Client. In Simple Words When you Create a Post and for Some Reasons You delete the Post But when Your Subscribers or Readers Go to That Deleted Post Then Server Will Show the Default 404 Error Message. but the default message is not Good in looks and attractive.
Why To Use Custom 404 Page Design?
Custom 404 Page Design is Optional Not Mandatory But If you ask me it should be used to improve user Interface. As We are giving Home Page Link, Search Box and Very Unique 404 Images inside the 404 Custom Page. Imagine when a user comes to your broken page and didn't find an easy way to Go back to home page or search for other posts then he will close the tab. and Go to other site. If you are selling something in your blog then you have loose your potential customer. Or if you are running a blog then you loose a potential subscriber.
Check This Widget Also: CSS3 Popular Posts Widget with Auto Numbers+hover effect!
See The Demo Below After the tutorial you will get this Widget:
Let Start! How To Add 404 Page Design in our Blog:
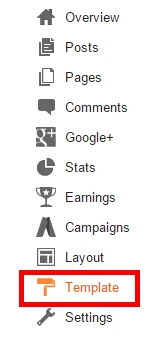
- Go To Blogger > Template
- Backup your template
- Click "Edit HTML"
- Just after <head> tag paste the following CSS link:
<link href='https://maxcdn.bootstrapcdn.com/font-awesome/4.5.0/css/font-awesome.min.css' rel='stylesheet'/>
If You Already Have Font-awesome Scripts then please skip that Above step.
First We Will Complete CSS Styling For Custom 404 Page:
]]></b:skin>
STEP 5: Copy This Below Code Before ]]></b:skin>
/*--- www.trendingwidgets.com (TW Network) Popular Posts --- */.error_wrap{
margin: 0 auto;
background: url(https://blogger.googleusercontent.com/img/b/R29vZ2xl/AVvXsEgq3WKvMYfX423MU0ESOaV16559uIsNtvyucTI_YqrkRpNWbeomqAWtQkr8ip5l8YOoT4ZXdgIFQU7Y5bfQlyiJxg0IeB2wEZlPKqHSvMLMmqRPvPvvJoQzqVPdqoPI1hugf1nZ7YTXqi4/s1600/404+Not+found+Error.jpg);
background-size: 100% 100%;
height: 100%;
text-align: center;
position: relative;
top: 50%;
font-family: 'Arial', sans-serif;
}
.error_bg{
height: 100%;
background: rgba(0,0,0,0.5);
}
.error_wrap h3, .error_wrap .searchWrap{
font-size: 160%!important;
position: relative;
top: 30%;
color: #fff;
width: 100%;
line-height: 1.6em;
}
.error_wrap .error_heading{
display: block;
position: relative;
top: 30%;
}
.error_wrap .searchWrap{
max-width: 30%;
margin: 0 auto;
}
.error_wrap a{
color: rgba(255,255,255,0.9);
text-decoration: none;
}
.error_wrap .searchWrap input[type=text] {
width: 70%;
padding: 14px 20px;
margin: 10px 0;
display: inline-block;
border: 2px solid #1276F8;
border-radius: 4px;
box-sizing: border-box;
font-size: 14px;
}
input[type=submit] {
background-color: #1276F8;
color: white;
padding: 16px 20px;
margin: 8px 0;
border: none;
border-radius: 4px;
cursor: pointer;
Font-weight: bold;
}
input[type=submit]:hover {
background-color: #1276F8;
}
.error_wrap a:hover{
text-decoration: underline;
}
STEP 6: All Done Save the template and Check it in your site.
Now We Will Complete the HTML Part For Custom 404 Page:
STEP 1: Log in to your Blogger account and Go to your Blogger Dashboard
STEP 2: Now go to Settings-> Search Preference -> As Shown in the Image Below


STEP 4: Now Paste The Below code in the box and Click on Save Changes.
<div class="error_wrap">
<div class="error_bg">
<span class='error_heading' style="color:#fff; font-size: 170px"><strong>4<i class="fa fa-cog fa-spin"></i>4</strong></span>
<h3 style="font-size:17px;">Sorry 404, You are trying to reach a Broken Page.<br/> The Page has Moved or Deleted...!<br/><a href="/">Click here</a> to go to Homepage <br/> Or Search Below ...</h3>
<div class="searchWrap">
<form action='/search' id='searchform' method='get'>
<input id='s' name='q' onblur='if (this.value == "") {this.value = "Search...";}' onfocus='if (this.value == "Search...") {this.value = "";}' type='text' value='Search...'/>
<input id='searchsubmit' type='submit' value='Go'/>
</form>
</div>
</div>
<!-- Coded by http://www.trendingwidgets.com/ -->
</div>
Customization:
- The Yellow Highlighted Text is Responsible for the text to show we have written the best from us but if you want to write your own text then change it.
STEP 6: All Done Save & Check it in your site.
That's It Thanks For Following our Tutorial ''Best 404 Page Design & Right Settings For Blogger 404 Pages! '' Along With us If you found any difficulty Please Comment and Share Your Valuable Opinion. And Stay tuned for More Tutorials Like This and Share this with your friends.


No comments:
Post a Comment