
Hello Friends we are back with another useful widget for blog i.e. responsive tabbed content widget which consists of 3 columns and one column will show at a time. This widget will save the space of your site as you can add three widgets in this section.
Advantages of using tabbed content box:
- Using this tabbed content box will save your blog space
- You can add desired number of widgets based on the priority
- This is responsive and can fit to any website
- As it is responsive you can add it to sidebar, footer, above posts etc
- It is attractive and make your site or blog more professional.
- It is created in pure JavaScript no frameworks has been used so less code is used.
- You can add/remove the widget from the layout of the blogger.
We have not used any JavaScript Framework in creating this Tabbed Content Widget Box. We used very less code and most of the styling is done through CSS. This widget will load very fast. We have added the hover effect and make it look very stylish.
You can customize this widget this looks good in sidebar, above footer, below posts etc so it is your choice to place it anywhere you like but in the separate section.
You can use widgets like Recent Posts, Popular Posts, Blog Archive, Random Posts, Social Followers Box, Stats Widgets Like Alexa etc widgets in this Tabbed Content Box Widget.
First we will add the styling( CSS ):
STEP 1: Log in to your Blogger account and Go to your Blogger Dashboard

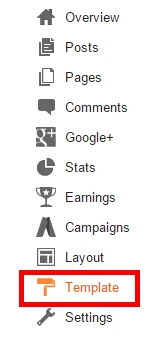
STEP 2: In The Left Side Bar You will find Template Section as highlighted in the image above Click on Template.
STEP 3: Click On Edit HTML.
STEP 4: After Clicking on Edit HTML Search for
]]></b:skin>

STEP 5: Copy This Below Code Before ]]></b:skin>
/* Start Tabbed Content Box By http://www.allbloggertricks.com */
.ABT_Hide{ display: none; } .ABT_Tabs_Wrap{ margin: 0px; max-width:100%; box-sizing: border-box; } .ABT_Index_Tabs_Wrap{ display:flex; max-width:100%; padding: 5px 5px; box-sizing: border-box; } .ABT_Tabs{ max-width: 30%; font-size: 18px; font-family: IMPACT; color: rgb(255,88,0); margin: 5px 8px; cursor: pointer; border-radius: 2px 10px 2px 10px; box-shadow: 0px 0px 5px 3px rgb(193,193,193); padding: 5px 5px; text-align: center; flex: 1 0 auto; display:flex; justify-content: center; align-items: center; flex-direction: column; box-sizing: border-box; position: relative; } .Tab_content{ width:100%; box-sizing: border-box; margin-top: 10px; padding: 10px 10px; display:flex; } .ABT_active{ background: rgb(220,240,240)!important; } .ABT_Tabs:hover{ background: rgb(220,240,240)!important; } .ABT_Tabs:before{ content: ""; height: 100%; width: 5%; background: rgb(255,88,0); position: absolute; left:0px; border-radius: 2px 10px 2px 10px; }
/* End Tabbed Content Box By http://www.allbloggertricks.com */
STEP 6: All Done Save the template.
[II] We Will Add Markup ( HTML):
STEP 1: Go To Template Section As Shown in The Image Below
<aside class="sidebar-wrapper">
or<asideor<div id='sidebar-wrapper'>orsidebar
STEP 3: Copy This Below Code And Paste it after the above found code
<!--Start Tabbed Content Box By http://www.allbloggertricks.com-->
<div class="ABT_Tabs_Wrap">
<div class="ABT_Index_Tabs_Wrap">
<div class="ABT_Tabs ABT_active" data-abt_tab="Tab1" id="ABT_Tab1">
Popular</div>
<div class="ABT_Tabs" data-abt_tab="Tab2" id="ABT_Tab2">
Labels</div>
<div class="ABT_Tabs" data-abt_tab="Tab3" id="ABT_Tab3">
Archive</div>
</div>
<div id="tabsWrap">
<div class="Tab_content" id="Tab1">
<b:section class='ABT_Tabbed_Widget' id='ABT_Tab_1' preferred='yes'></b:section>
</div>
<div class="Tab_content ABT_Hide" id="Tab2">
<b:section class='ABT_Tabbed_Widget' id='ABT_Tab_2' preferred='yes'></b:section>
</div>
<div class="Tab_content ABT_Hide" id="Tab3">
<b:section class='ABT_Tabbed_Widget' id='ABT_Tab_3' preferred='yes'></b:section>
</div>
</div>
</div>
<!--Start Tabbed Content Box By http://www.allbloggertricks.com-->
<script type="text/javascript">
var ABT_Tabs = document.querySelectorAll(".ABT_Tabs"); var ABT_AllTabs = document.querySelectorAll(".Tab_content"); ABT_Tabs.forEach(function(a){ a.addEventListener("click", showTabs); }); function showTabs(){ for(var num in this.parentElement.children){ this.parentElement.children[num].className = "ABT_Tabs"; console.log(this.parentElement.children[num]); } this.classList.add("ABT_active"); for (var i in ABT_AllTabs){ ABT_AllTabs[i].className = "ABT_Hide";} var getId = this.attributes["data-ABT_Tab"].value; var TheId = document.getElementById(getId); return TheId.className === "ABT_Hide" ? TheId.className = "" :TheId.className = "ABT_Hide"; }
</script>
<!--End Tabbed Content Box By http://www.allbloggertricks.com -->
STEP 4: All Done Save the template And Check it in your Blog Layout.
Customization:
- The Orange Highlighted Text Represents the Title of the Widget you want to show under this box so change the orange text in all three occurrences with your desired widget title but don't use lengthy title otherwise it will break the widget.
Conclusion:
Finally you have added this widget to your desired location .
in the blog but if you are facing any difficulty in adding this widget then please comment or contact us we will help you in adding this widget.
And those who have added successfully without any hurdles congrats to them. and if you want any styling or improvement to this sidebar tabbed widget notify us we will add it for you.
That's It Thanks For Following our Tutorial '' How to Add a WP Style Flexible Tabbed Sidebar Widget in Blogger? '' Along With us If you found any difficulty Please Comment and Share Your Valuable Opinion. And Stay tuned for More Tutorials Like This and Share this with your friends.
Incoming Search Terms:
Incoming Search Terms:


No comments:
Post a Comment