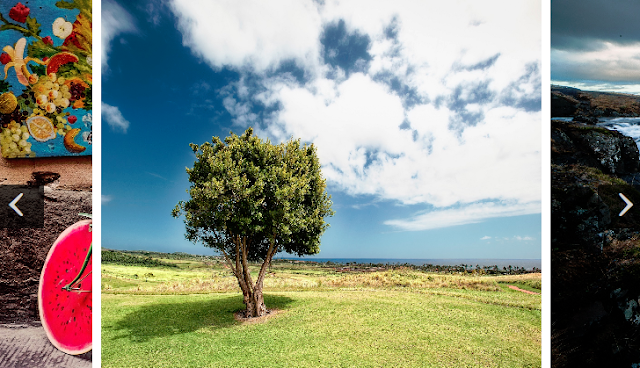
The highlight of this slider is it shows partially visible side slides means previous and Next Slide.
This slider works using the Pure javascript only the transition and Showing previous and next slides part have been coded using frameworks like jQuery and Animate.css
The Slider is Fast can take the full width of the screen or the width of the container. It depends on users.
Transitions are added using Animate.css library with jQuery. More than 5 transition effects have been added and it will take random effect automatically on every change of slide.
We will develop the version 2.0 where there will be the possibility of adding content also with images.
The Slide has a lot of scope for customization from the looks to functionality. Users can customize it according to their preference
We have created this slider and uploaded it to GitHub so that it get support and updates too. Users can ask questions and also can contribute to making this slider more awesome.
Features:
- jQuery Pretty Image Slider is Responsive.
- jQuery Pretty Image Slider Shows half of the previous and next slides.
- jQuery Pretty Image Slider has Random Transition Effects.
- jQuery Pretty Image Slider looks very elegant and premium.
Demo to the Slider.
You can resize the browser and check its responsiveness.
Now Let start the steps to add it and show you the code to show this slider on your blogs or websites.
Here is the code below.:
<link rel="stylesheet" href="https://cdn.rawgit.com/mmnauman/ABTSlider/467e7c54/css/style.css">
<script src="https://ajax.googleapis.com/ajax/libs/jquery/3.3.1/jquery.min.js"></script>
<link rel="stylesheet" href="https://cdn.jsdelivr.net/npm/animate.css@3.5.2/animate.min.css">
<div class="sliderWrap">
<div class="slider">
<div id="prev" class='prev prevSection navigate'>
<span>‹</span>
</div>
<div id='slidesContainer' class='slidesWrap'>
<div class="slide active">
<img src="Your-image-url-here" alt="First Image" title='1'>
</div>
<div class="slide">
<img src="Your-image-url-here" alt="Second Image" title='2'>
</div>
<div class="slide">
<img src="Your-image-url-here" alt="Third Image" title='3'>
</div>
<div class="slide">
<img src="Your-image-url-here" alt="Fourth Image" title='4'>
</div>
</div>
<div id="next" class='next nextSection navigate'>
<span>›</span>
</div>
</div>
</div>
<script src='https://cdn.rawgit.com/mmnauman/ABTSlider/467e7c54/helperFunctions.js'></script>
<script src='https://rawcdn.githack.com/mmnauman/allbloggertricks.com-slider/3c9b5226f0895d7386dd9b9a440c878b04408204/script.js'></script>
Click Here To Open Raw Code:
Customization:
- The Red Highlighted Text is responsible for The Image link so change every instance and add image URL with the extension .jpeg/png/gif, etc
- The Orange Highlighted Text is Responsible for The alt text for the image so change this text and add your preferred text.
- The Light-blue Highlighted Text is Responsible Title o the image you added to the slider. Change this numbers with your image title. This will appear if the image is not loaded properly.
Adding or Removing Slides:
If you want to add more slides then all you need to do is add this div section after the slide ended.
<div class="slide">Add this above div section to add an extra slide. You can add how many slides you want there is no limit just one tip.
<img src="Your-image-url-here" alt="Image" title='ImageName'>
</div>
Tip: UseSmall Size images or compressed images so that the slider load the images faster.
To remove the slide from the slide all you need to do is find and remove the above div section.
Conclusion:
This image slider is unique and can make your site/blog look more premium and more engaging. So add it to your site and if you face any problem you can contact us here in the comments section or check out our project on Github and comment there.
https://github.com/mmnauman/ABTSlider
https://github.com/mmnauman/ABTSlider
That's It Thanks For Following our Tutorial '' jQuery Pretty Image Slider v1.0 with partially visible side slides '' Along With us If you found any difficulty Please Comment and Share Your Valuable Opinion. And Stay tuned for More Tutorials Like This and Share this with your friends.


how to resize it it's too bigggg
ReplyDeleteHello, By default the width is 100% but you can customize it easily just use this class in the widget code like this change the values of width and height based on your site layout.
ReplyDelete.sliderWrap{width: 500px!important; height: 350px!important }