What is Popular Posts Widget?
Popular Posts Widget Basically Was Launched by blogger in 2011. Where the most viewed or most popular posts will display First.
Why To Use Popular Posts Widget?
Popular Posts Widget is recommended to use in every Site or Blog of any Type or niche. Popular posts widget will increase blog views and engage readers more efficiently. and we can add this in the sidebar and look beautiful. more importantly the visitors can see the site most popular posts arranged very well.
Let Start! How To Add Popular Posts Widget in our Blog:
First We Will Add Popular Posts Widget:
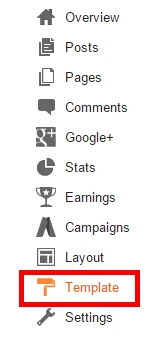
STEP 2: In The Left Side Bar You will find Layout Section as highlighted in the image above Click on Layout.
STEP 3: Click On "Add a Gadget" As highlighted in the image above.
STEP 4: After Clicking on "Add a Gadget" Choose "Popular Posts" from the list and Open it you will find many options to customize it as highlighted in the image above.
STEP 5: You will need to configure its settings as shown in the image above: uncheck "snippet" Its better that you display at most 7-9 posts. and if you want to make it more simple you can uncheck "image thumbnail" also everything else is good now Save it.
Styling The Popular Posts Widget:
]]></b:skin>
STEP 5: Copy This Below Code Before ]]></b:skin>
/*--- www.trendingwidgets.com (TW Network) Popular Posts --- */
.popular-posts ul { padding-left: 0px; counter-reset: trendingwidgets;}
.popular-posts ul li:after { list-style-type: none; padding: 0.3em 10px ;border-radius: 10px 2px;counter-increment: trendingwidgets; content: counter(trendingwidgets); font-size: 16px; background: #292D30; color: #ffffff; font-weight: bold; font-family: georgia; border: 2px solid #dddddd; box-shadow: 1px 2px 9px #666666; position:relative;float: right;display:inline-block;top:-50px;transition: transform 2s;}
.popular-posts ul li:hover:after{ transform: rotate(360deg);}
.popular-posts ul li { border-bottom: 1px dashed #dddddd; }
.popular-posts ul li:hover { border-bottom: 1px dashed #696969; }
.popular-posts ul li a { text-decoration:none; color:#5A5F63; }
.popular-posts ul li a:hover { text-decoration:none; }
#PopularPosts1 .item-thumbnail {border: 1px dotted grey; width: 70px; height: 70px;padding:0px!important; border-radius: 10px 2px; transition: transform 2s;}#PopularPosts1 .item-thumbnail-only img{border-radius: 10px 2px; width:100%; height: 100%; padding: 0px!important;}#PopularPosts1 .item-thumbnail:hover{transform: rotate(360deg);}
Customization:
- The Yellow Highlighted Text is for Background Color of the Popular Posts Widget. So Change the Color of your own Choice. and Play with it till you get your best choice.
- The Green Highlighted Text is Responsible For Text Color To change the text color of the Numbers edit #ffffff
- The light blue Highlighted Text is Responsible For Width and height of Popular Posts Widget Thumbnail Image. So If you want to increase or decrease it. its your choice. Have Fun.
STEP 6: All Done Save the template and Check it in your site.
That's It Thanks For Following our Tutorial ''CSS3 Popular Posts Widget with Auto Numbers+hover effect! '' Along With us If you found any difficulty Please Comment and Share Your Valuable Opinion. And Stay tuned for More Tutorials Like This and Share this with your friends.


No comments:
Post a Comment